Showing posts with label craft. Show all posts

Tuesday, January 10, 2012

Happy Birthday Amelia! Cause You Only Turn 5 Once

On January 2nd, Amelia turned five years old. Since her 4th birthday Amelia told me she wanted a My Little Pony party for her fifth birthday. She stuck with that theme until late November, when she decided she wanted a fairy party. So we planned to do a fairy theme since then and worked little bits at a time making decorations and things for the party.

Amelia was so excited to set the table.

Birthday Girl

Amelia wearing her wings. Behind her are hanging the halo's we got for everyone.

Amelia wanted a Tinker Bell bun in her hair.

...so excited for her friends to arrive...

We ate lunch at the party, so cute seeing all the little girls with their wings and halo's.

This picture goes to show just how concerned I was about getting pictures of everything. I took a picture after we had searved all of the sandwiches. My friend Geidy who was also Amelia's Sunbeam teacher last year, and mother to one of Amelia's friends, made that delicious tortellini salad! (Thanks Geidy!!)

...we played the game Pin the Wings on the Fairy...
(I used this image and traced in onto a large piece of paper without the wings, an then traced, and cut out a set of wings for each girl to pin.)

....and sang happy birthday....

....Amelia was very excited focused on blowing out her candles and making her wish...

...  all the girls choose a cupcake to eat...

... and enjoyed eating them...


... what cute fairies....

The girls LOVED the wings and halos, and we sent them home with each of the girls instead of favor/treat bags. I bought them from halohaven.com and got an amazing deal on cyber Monday. If you are wanting to know where to buy fairy wings, look no further.

Even though Amelia wanted a fairy party, she still wanted some My Little Pony's. I told everyone what she wanted, and 6 of her 7 guests got her something my little pony. She was a happy girl!
...post party with a fairy pony...

These flowers I made for the chairs. They were SUPER easy. I made them with a double layer of tulle fabric tied into a bow with extra long ends, then tied the long ends into another bow and opened/separated the "bunny ears" part of the bows and fluffed them.

It's hard to believe how quickly time has passed. Oh how I love my sweet girl.


Happy Birthday, Amelia my love. The last five years have been the best of my life.

Friday, December 30, 2011

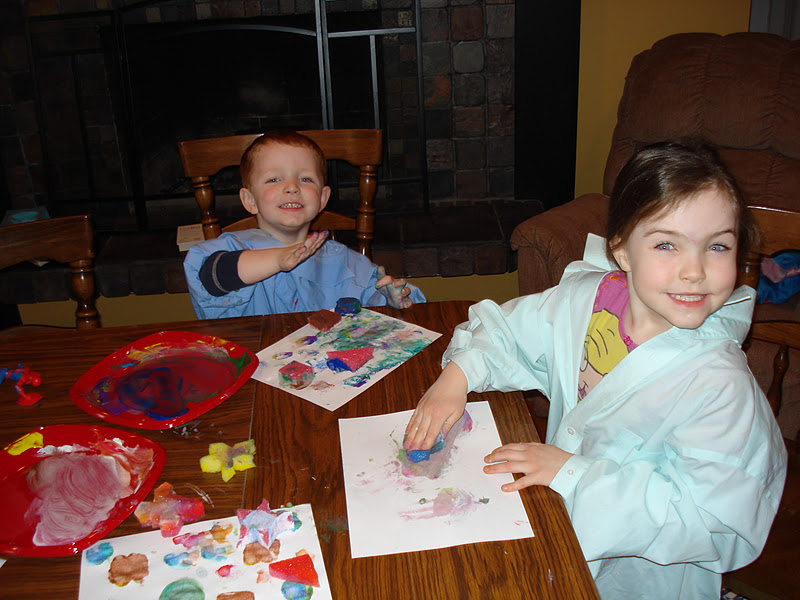
Christmas Break Painting Activity

Years of being Amelia's mom has taught me that she needs things to do. Without new engaging and fun things for her to be involved in- read: why I have my four year old learning to read and taking violin lessons, disasters happen. It is no fault of her own, she is just VERY into creating and creativity. As a result a simple painting activity was drawn out into a three stage activity. We 1) drew shapes on some dollar store sponges, 2) "snipped" them out with scissors, and 3) finally used them to paint. Stages one and two were done a previous day. I made the kids wait until I had the house in order enough that the added mess of painting wouldn't make me loose it while giving up control and my kitchen table for the painting. I admit it. I'm not a perfect mom. Control is something I want, but I'm learning more and more, that I have less and less of it.

Behold the painting fun:


The mess wasn't nearly as bad as I thought it would be. We will for sure do it again. Amelia and Miles both LOVED it.

Monday, October 31, 2011

Pumpkin Carving

We didn't carve pumpkins last year because we were in the middle of a move, but the year before, I remember it being so stressful. This year was nothing but enjoyable for me. Its great when things like this turn from doing them out of guilt/obligation and being stressed out the whole time, to doing them and the whole family to have fun. A welcomed change to be sure. Amelia was pretty excited to dig out her pumpkin. We finally carved our pumpkins Saturday night. She was so happy and excited to get her Halloween on.


Miles, bravely cleaning out the inside of his pumpkin.

Getting ready to carve. Right after this shot, we decided to have Amelia draw on her pumpkin, what she wanted it to look like.

Brodrick was a happy observer. It helped to have someone hold him on a lap so he could get a good look at the action.

So dramatic exclaiming something along the lines of pumpkin carving.

Daddy hard at work carving Miles pumpkin free style.

Miles was so pleased with him pumpkin. A few minutes after this picture, his jack-o-lantern was given a nose.

Amelia's scary face and final product- she was very proud of her jack-o-lantern. She drew out the face all herself with a marker and then I carved it for her. She wanted to be sure her jack-o-lantern was a female. Notice the eyelashes, squished hear shaped mouth, and rosie cheeks.

Miles followed suite and did a scary face too.

Monday, October 10, 2011

Royalty

I had plenty of felt left over from the fall leaf garland so I decided to make some crowns for the kids. I went online and searched for an Aurora crown craft and found a free one. I clicked on the template and used the shape form Amelia's and extended the circumference to make it fit around her head. Then made one for Miles without the little notches. We had some glitter glue and the kids chose for me to decorate the crowns for them.
For Miles, a robot, M, star and football.

And for Amelia a rainbow, A, and some hearts.

Tuesday, October 4, 2011

Leaf Garland Tutorial


I love to decorate, but I hate to spend a lot of money. I also try to stay away from fall decorations that are just specific to either Halloween or Thanksgiving. Since I have to store the decorations I want to be able to use them for the greater parts of Sept/Oct/Nov. So I decided to make an inexpensive garland for autumn.

Items needed:
flannel in desired colors
scissors
contrasting colored thread
a outline/pattern of a leaf in desired size
twine
a sharpened pencil or large needle

I found a coloring pages online of leaves that I liked, copied and paste it into a Word Document so I could change the size of the leaves to what I wanted, then printed them off and cut one out.

I then cut some flannel to the size of the leaf and pinned it to the flannel. I only doubled up on the flannel because it was too hard to cut through three layers at once.

I then sewed the vein lines onto the leaf with contrasting colored thread. First I did the center vein. Then started at the outside part of the leaf, sewed into the center, pivoted the needle and sewed to the opposite part of the leaf.


Because I didn't have a large needle that I could tread the twine through, I used a sharpened pencil to poke a small hole at the top of the leaf.

Then I folded over my twine so it was stiff enough to stick through the hole. I threaded the twine through each pencil poked leaf in a random order.

Then I hung up the garland and spaced out the leaves how I wanted them.
Since I had everything but the flannel, this project cost me $0.50 which was spent on the flannel. Now go spend +/- a dollar and make your own!